Users
Administrators and users with permission to "Manage users" can add, invite and manage users. You can control folder permissions, ensuring users access only the files and folders you want them to access.
Add a user
Navigate to Admin > Users from the Main menu ![]() in the top left corner. You will now see a list of all users in your account.
in the top left corner. You will now see a list of all users in your account.
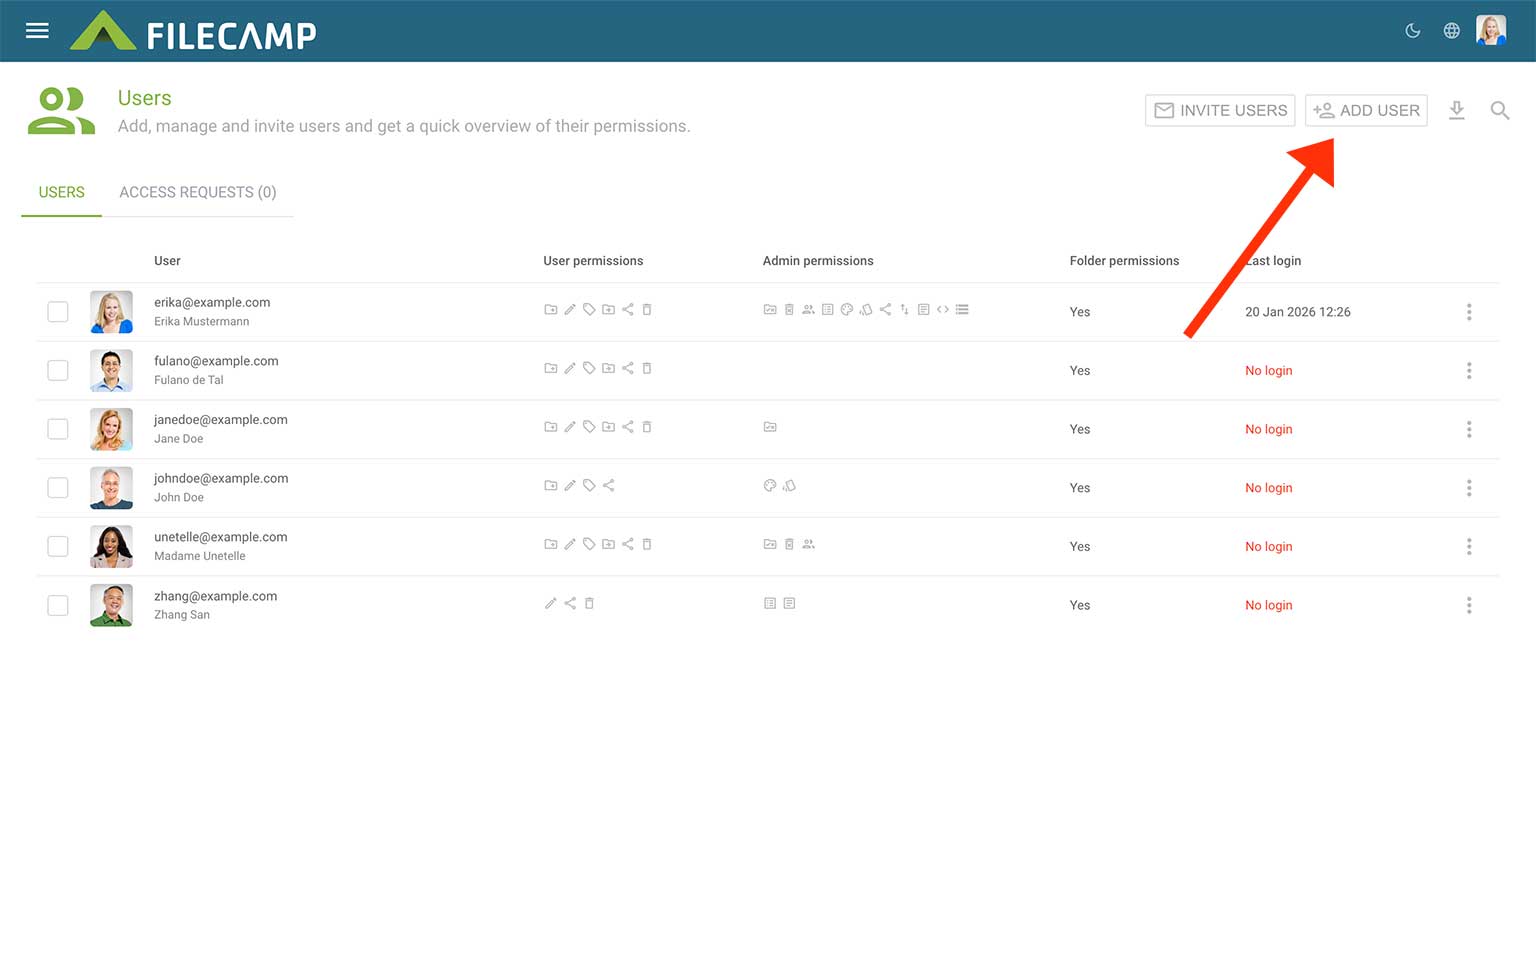
To create a new user click the Add user ![]() icon in the header menu. Enter a username (preferably an email address) and click Create. The user is now created and can be seen and edited from the Users List.
icon in the header menu. Enter a username (preferably an email address) and click Create. The user is now created and can be seen and edited from the Users List.
When you have given the user the correct permissions you can send the new User an invite with the users login credentials.
Editing a user
Navigate to Admin > Users.
Select the User you want to edit and a menu will appear to the right, where you can change the user's details.
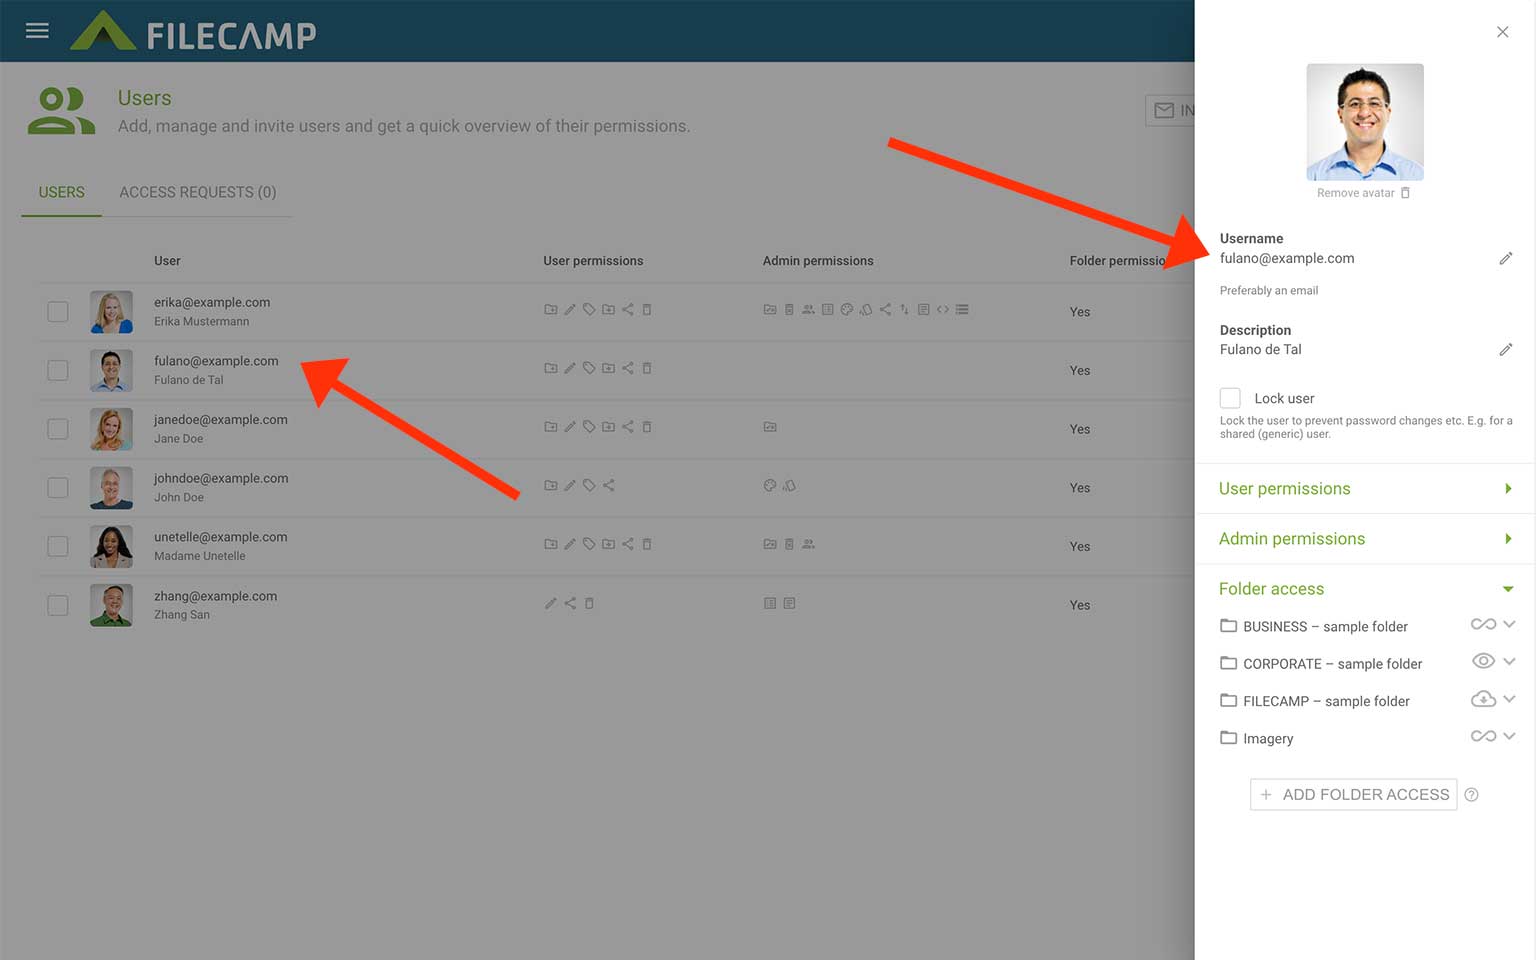
Username
Specify a Username (preferably an email address).
Description
You may add a description that describes the user. It could be the user´s real name or company/department, for example.
Lock user
Check this checkbox if you want to disable the user from changing his or her own login credentials. Also, locked users are not able to create Collections, use Favorites, and setup Notifications. Recommended if you allow multiple users to share login credentials.
Administrator
By default, the person who registers for a Filecamp account is the Administrator of that account. Additional Administrators can be created as necessary. Just check the Administrator checkbox, and this will overrule all other user, admin, and folder permissions.
Important facts about the Administrator user role:
- Administrators need to have a valid email address as their username. If there are any issues with your account, we'll send all your Administrators notifications about the problems. This is to ensure your account is safe and secure.
- You can have as many Administrators as you like, and you need to have at least one Administrator in your account.
- Only Administrators can view and edit other Administrators.
- Administrators are a powerful feature if you are utilizing our white label approach to resell Filecamp to your clients. Only Administrators will know that Filecamp is behind the platform.
User permissions
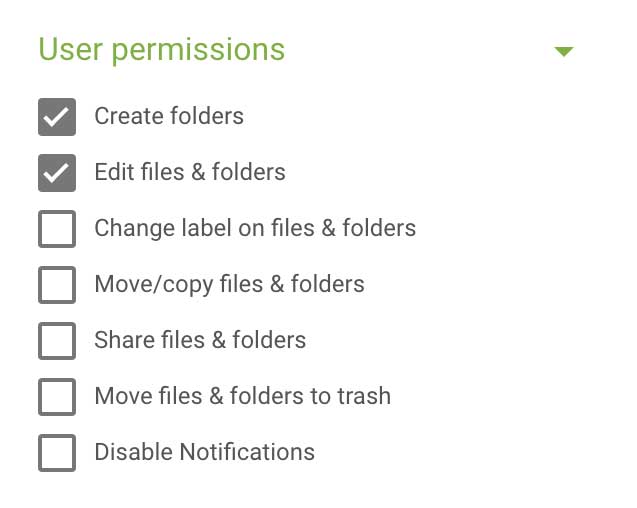
Assign specific User permissions to your company's employees, customers, vendors, external stakeholders, and other partners, so that they can manage certain user tasks:
- Create folders & links - permission to create new folders and links.
- Edit files & folders - permission to edit files & folder settings. Read more.
- Change label on files & folders - permission to change labels on files & folders. Read more.
- Move/copy files & folders - permission to move files & folders. Read more.
- Share files & folders - permission to create shared links to files & folders. Read more.
- Move files & folders to trash - permission to move files & folders to the trash. Read more.
- Disable Notifications - if you wish to prevent users from toggling notifications on and off themselves. Read more.
Admin permissions
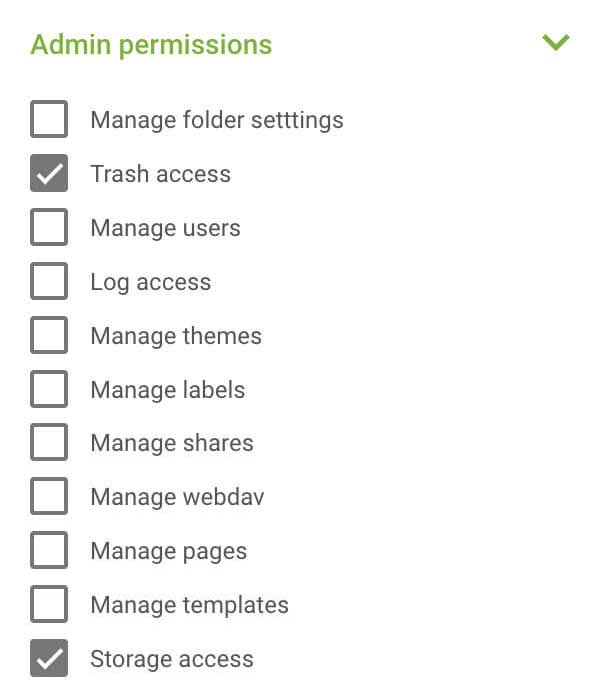
Assign specific Admin permissions to your company's employees and other stakeholders, so that they can manage certain admin level tasks:
- Manage folder settings - permission to view and edit the advanced folder settings. Read more.
- Trash access - permission to view and restore deleted items. Read more.
- Manage users - permission to manage users including their permissions. Read more.
- Log access - permission to view all log entries and keep track of all activity in your account. Read more.
- Manage themes - permission to customize your account to reflect your company or your clients brands. Read more.
- Manage labels – permission to manage labels and labelsets. Read more.
- Manage shares - permission to view, edit, and delete your users shared links from one central location. Read more.
- Manage WebDAV - permission to access your WebDAV (FTP) settings. Read more.
- Manage pages -permission to create and edit pages and assign them to specific themes. Read more.
- Manage templates - permission to edit message templates for upload, commenting, and label changes. Read more.
- Storage access - permission to see how much storage space you have available. Read more.
Folder access
Shows you a list of the folders this user can access, including the access level (View only, View & Download, Full access) to each folder. You can easily change, add, or remove folder access directly from this menu.
Click ![]() Add folder access, to give the user access to a folder. Just navigate to the folder you want to give the user access to and click the CHOOSE button.
Add folder access, to give the user access to a folder. Just navigate to the folder you want to give the user access to and click the CHOOSE button.
By default, all new users have ![]() Full access permission to the folders they have been granted access to. You can easily limit their access on folder level to
Full access permission to the folders they have been granted access to. You can easily limit their access on folder level to ![]() View only or
View only or ![]() View & Download.
View & Download.
![]() Full access = The user can view, download, and upload files in this folder and its subfolders. All user permissions apply. This is the default permission for new users.
Full access = The user can view, download, and upload files in this folder and its subfolders. All user permissions apply. This is the default permission for new users.
![]() View & Download = The user can view and download files in this folder and its subfolders, but cannot upload or make any changes. Some user permissions are ignored.
View & Download = The user can view and download files in this folder and its subfolders, but cannot upload or make any changes. Some user permissions are ignored.
![]() View only = The user can view files in this folder and its subfolders, but cannot download, upload, or make any changes. Some user permissions are ignored.
View only = The user can view files in this folder and its subfolders, but cannot download, upload, or make any changes. Some user permissions are ignored.
![]() Remove = The user's access to this folder is removed.
Remove = The user's access to this folder is removed.
Note: If a user has "View only" on even one folder, their effective permissions in Search will drop to that level. This means bulk and context menu actions will not be available anywhere in search.
TIP: You can also see and edit exactly which users can access a specific folder by entering any folder and click Permissions. See how.
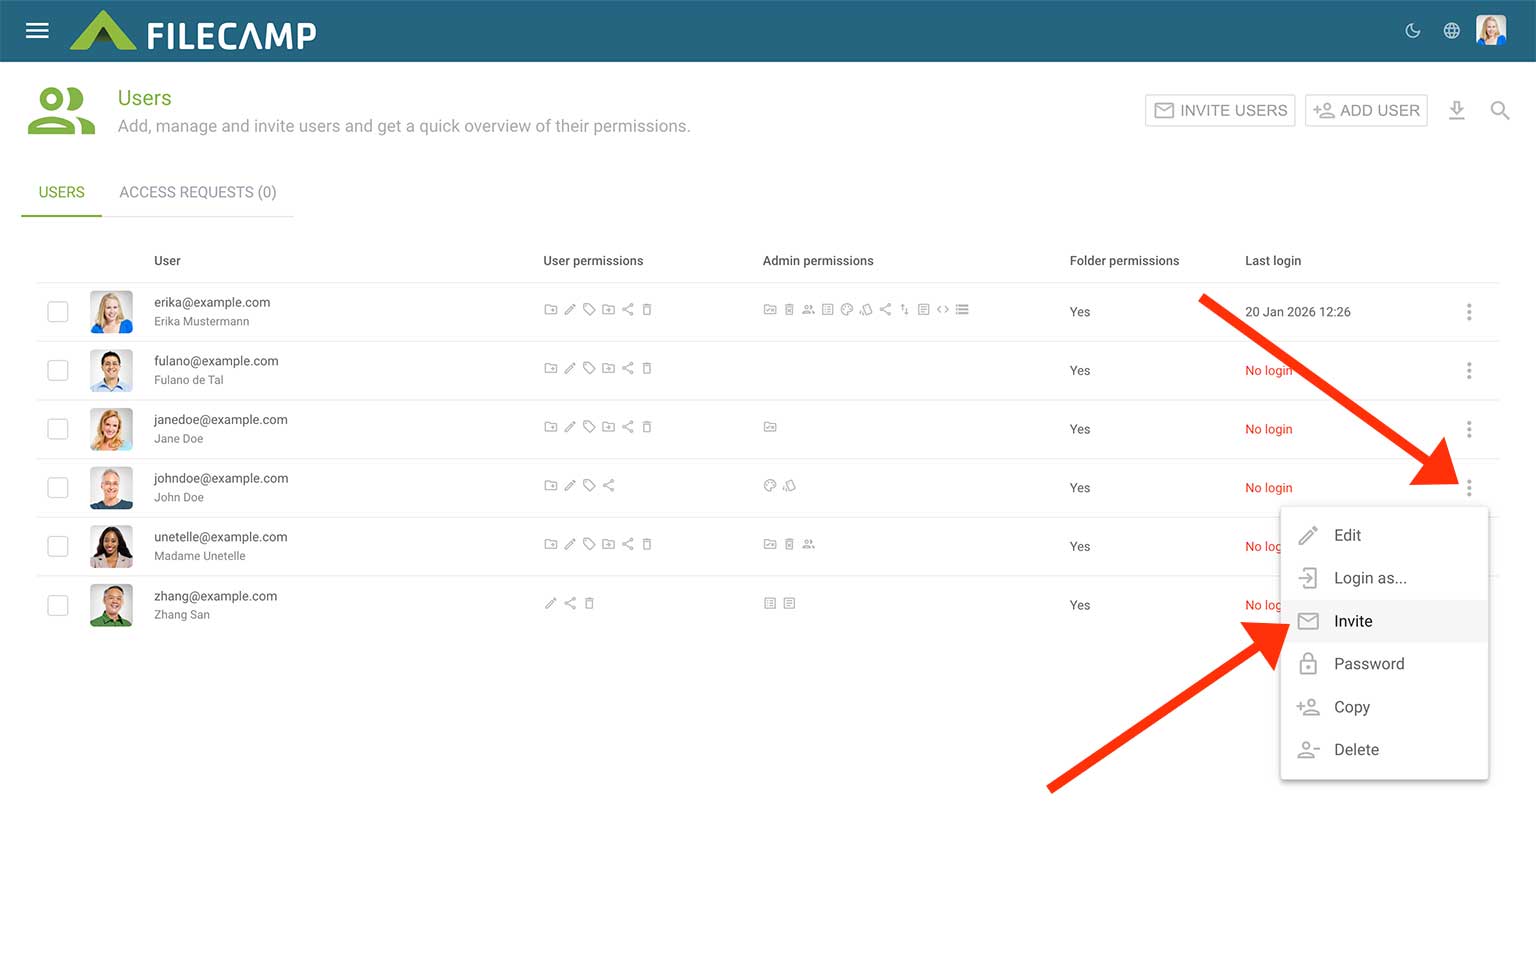
Invite user
You can easily send (or resend) an invite email to a user. Navigate to Admin > Users from the main menu.
Click the Three Vertical Dots ![]() icon on the users' list. Choose
icon on the users' list. Choose ![]() Invite.
Invite.
The user's password will now be reset and an email will be sent to the user containing a link where the user can enter their preferred password and log in.
Notice: For security reasons, invite links are single-use only. After the first click, they will no longer work.
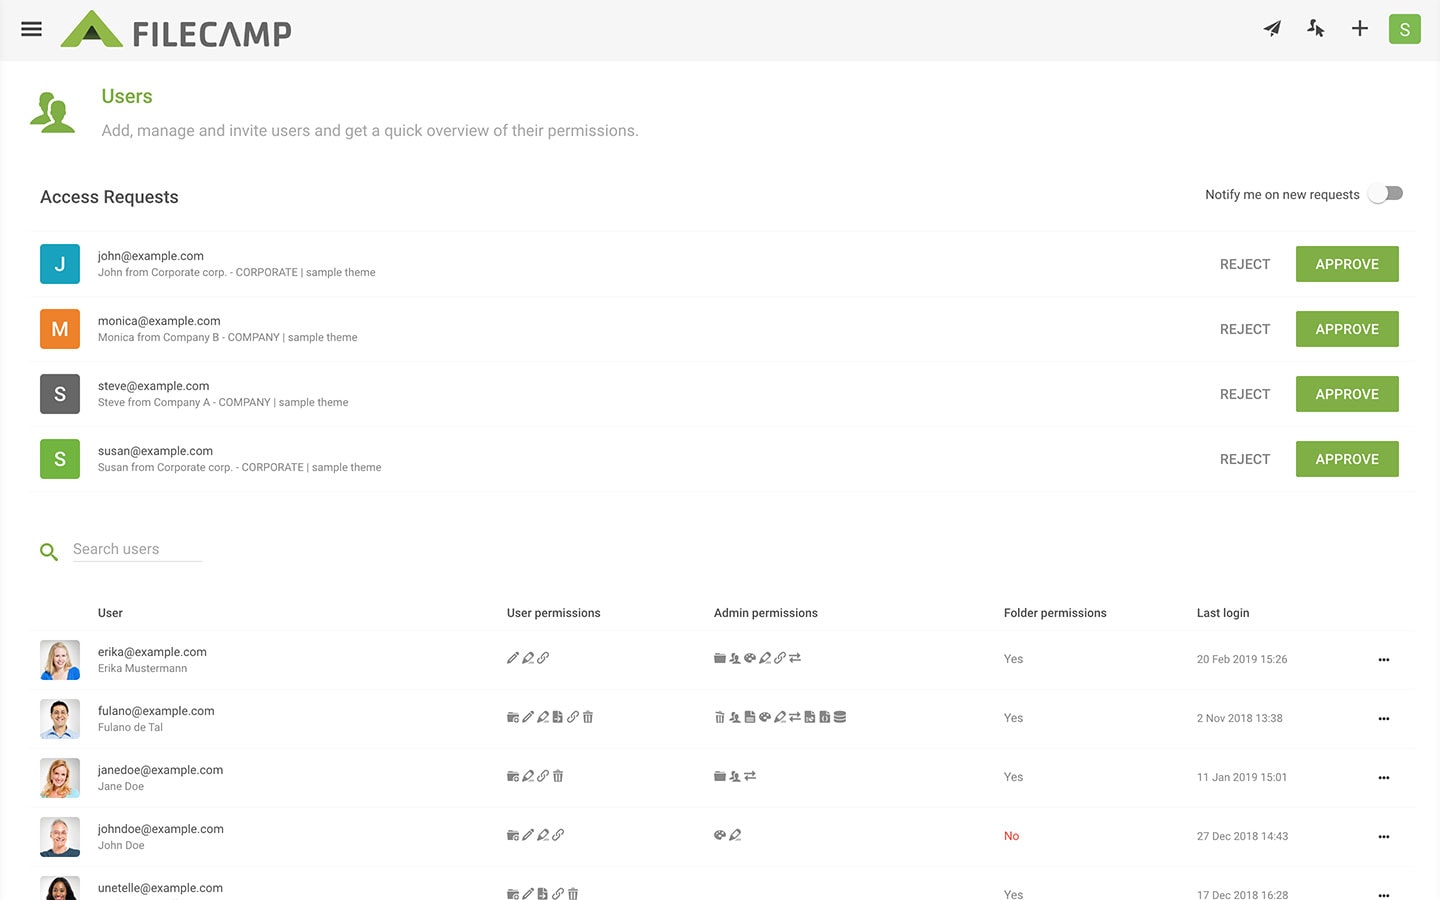
Access Requests
The more users you have accessing your Filecamp the more you have to deal with user management.
Bulk add & Invite users is a great way to automate access for a whole bunch of people in one go, but fails to handle ongoing access requests from your external partners. Filecamp's Access Requests feature (Pro plan only) relieves some of the headaches for dealing with such requests.
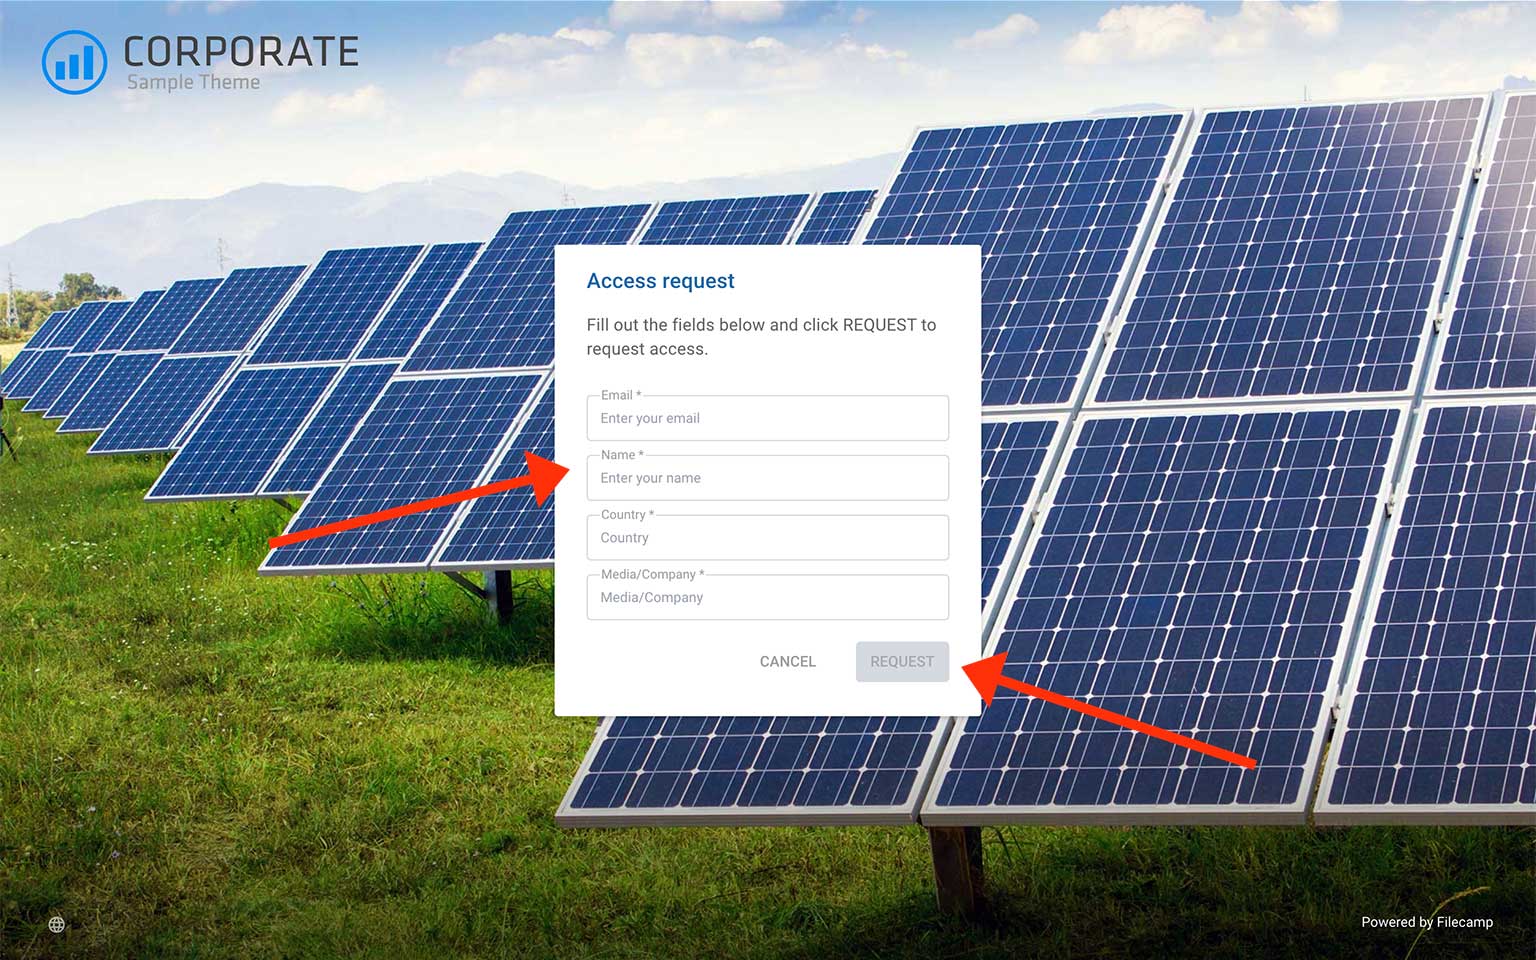
When enabled, new users can directly request access from the login page and fill in a simple form with their email address and name + up to three custom input fields.
Manage Access Requests
As an admin, you can monitor pending Access Requests by going to Admin > Users where you can Approve or Reject access for each request.
Once an Admin has approved access and mapped the new user to an existing user permission profile, a user account is created automatically and the user gets an email with instructions on how to create a password and log into the system.
If an Access Request is Rejected it will just be deleted and nothing more will happen.
Admins can choose to be notified by email message when there are new Access Requests.
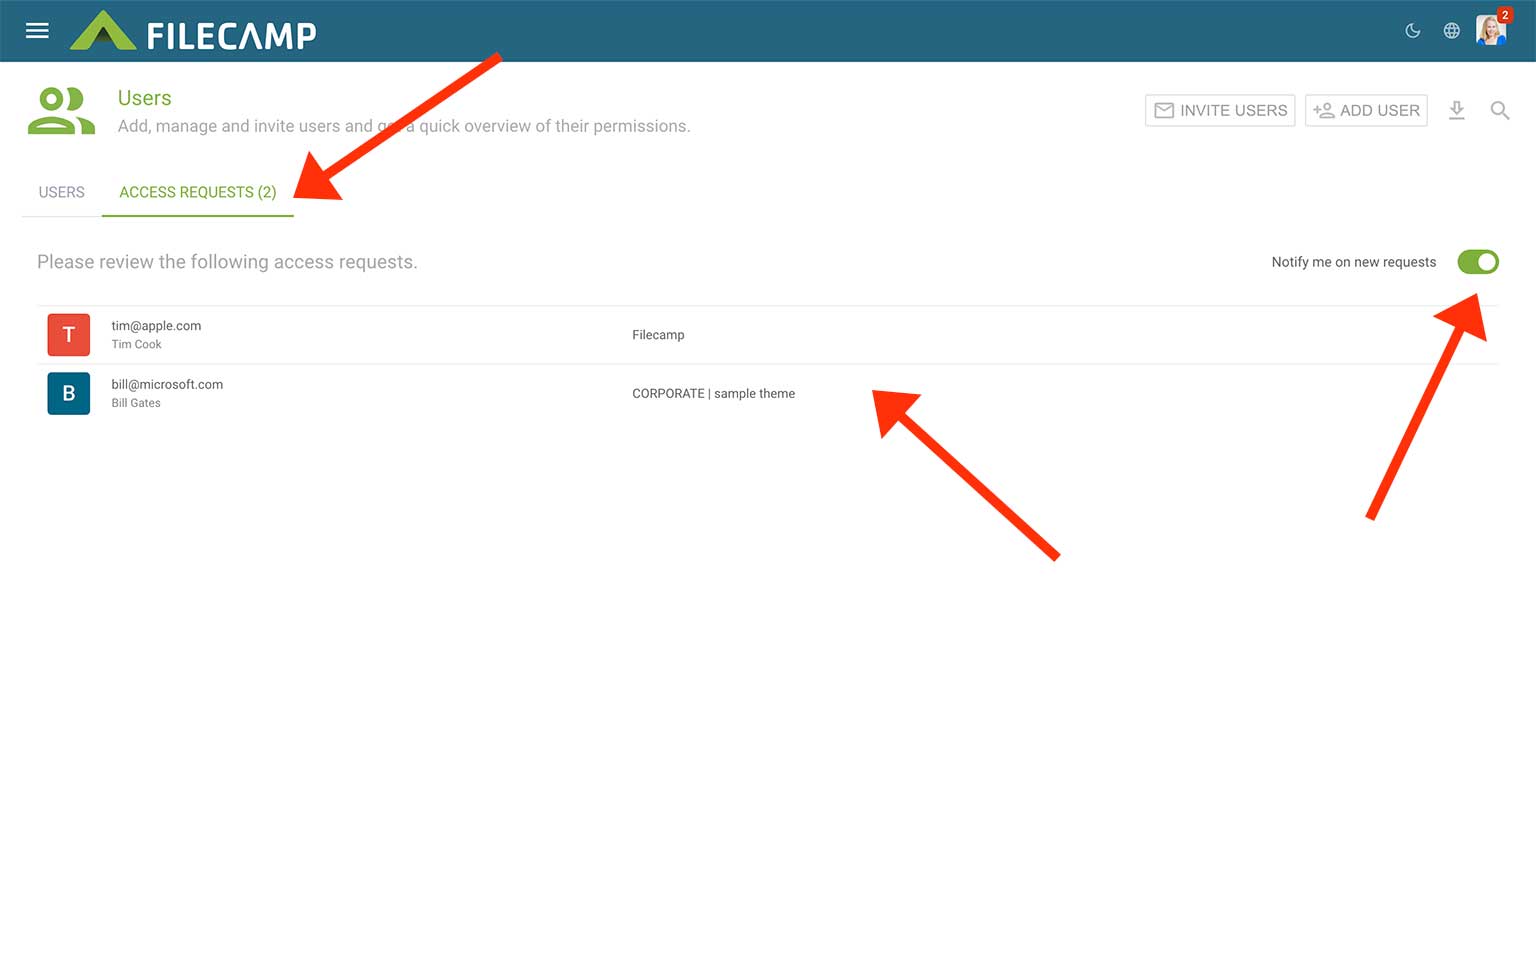
When Approving an Access Request you need to choose an existing user to copy User permissions, Admin permissions and folder permissions ensure the new user only accesses the folders you want them to access.
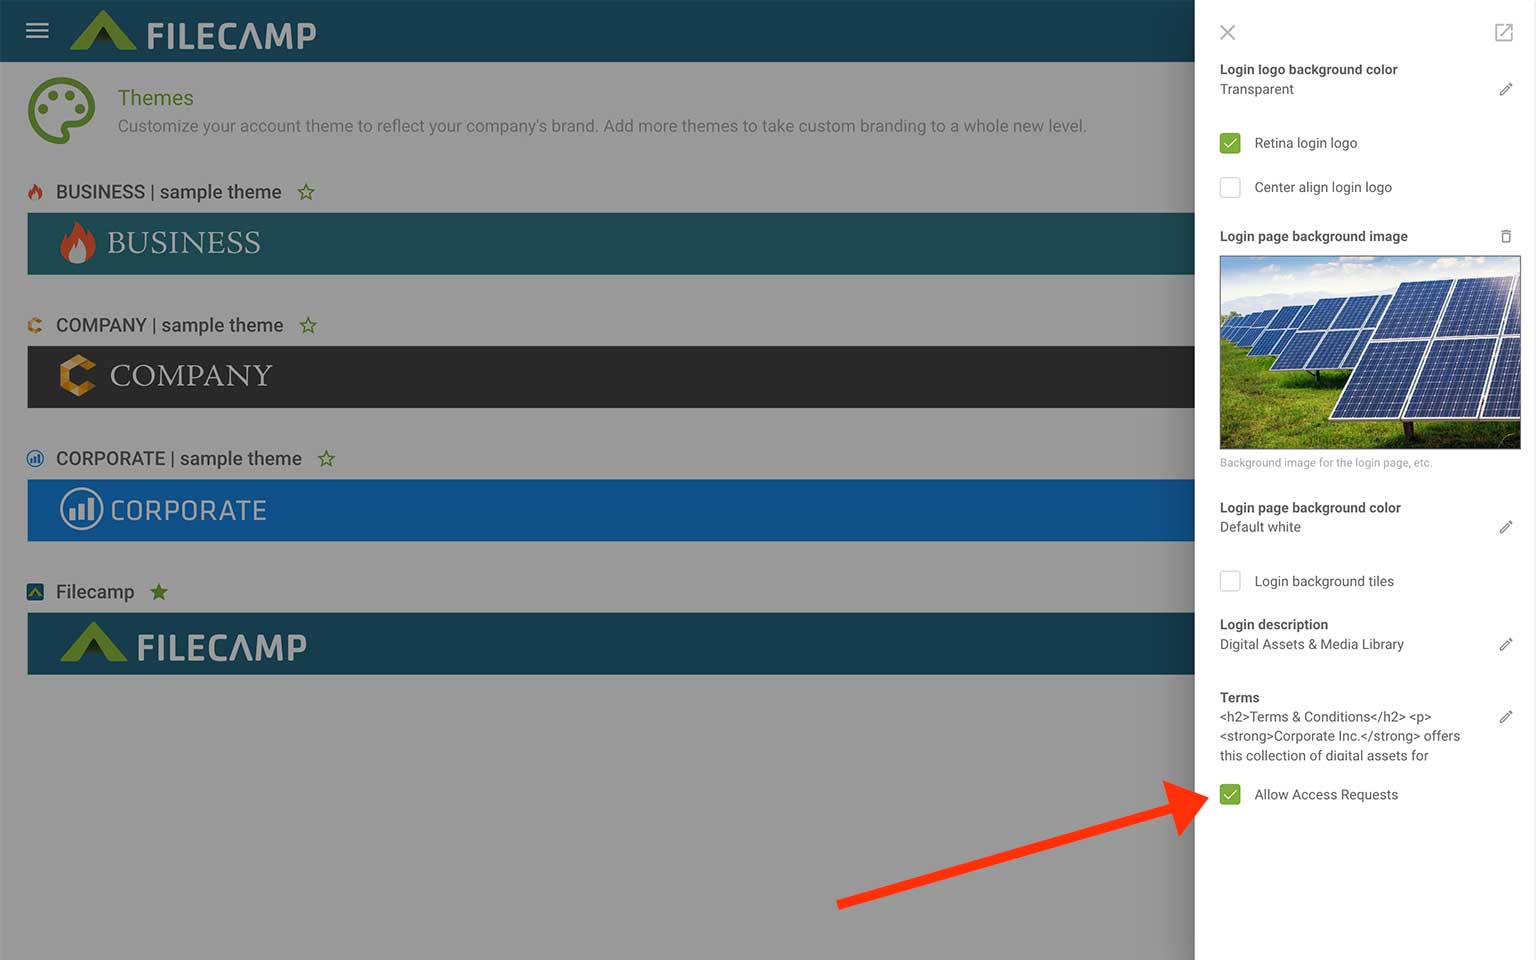
Enable Access Requests
For maximum flexibility, the Access Request feature can be enabled/disabled on the Theme level. So if you are operating with multiple themes you can turn this feature on for some of your Themes only. Read more about Themes.
Custom input fields in the Access Request form
If you like, you can add a few custom fields on the Access Request form.
Then users who requests access will be prompted to fill out these fields:
The text entered in these custom fields is shown in the Access Request approve menu. And is also shown in the email message if you have checked the "Notify me on new requests" checkbox.
Change a user's password
Admins can easily change the password for an existing user.
Locate the user in Admin > Users, click on the Three Vertical Dots ![]() icon and select Password
icon and select Password ![]() .
.
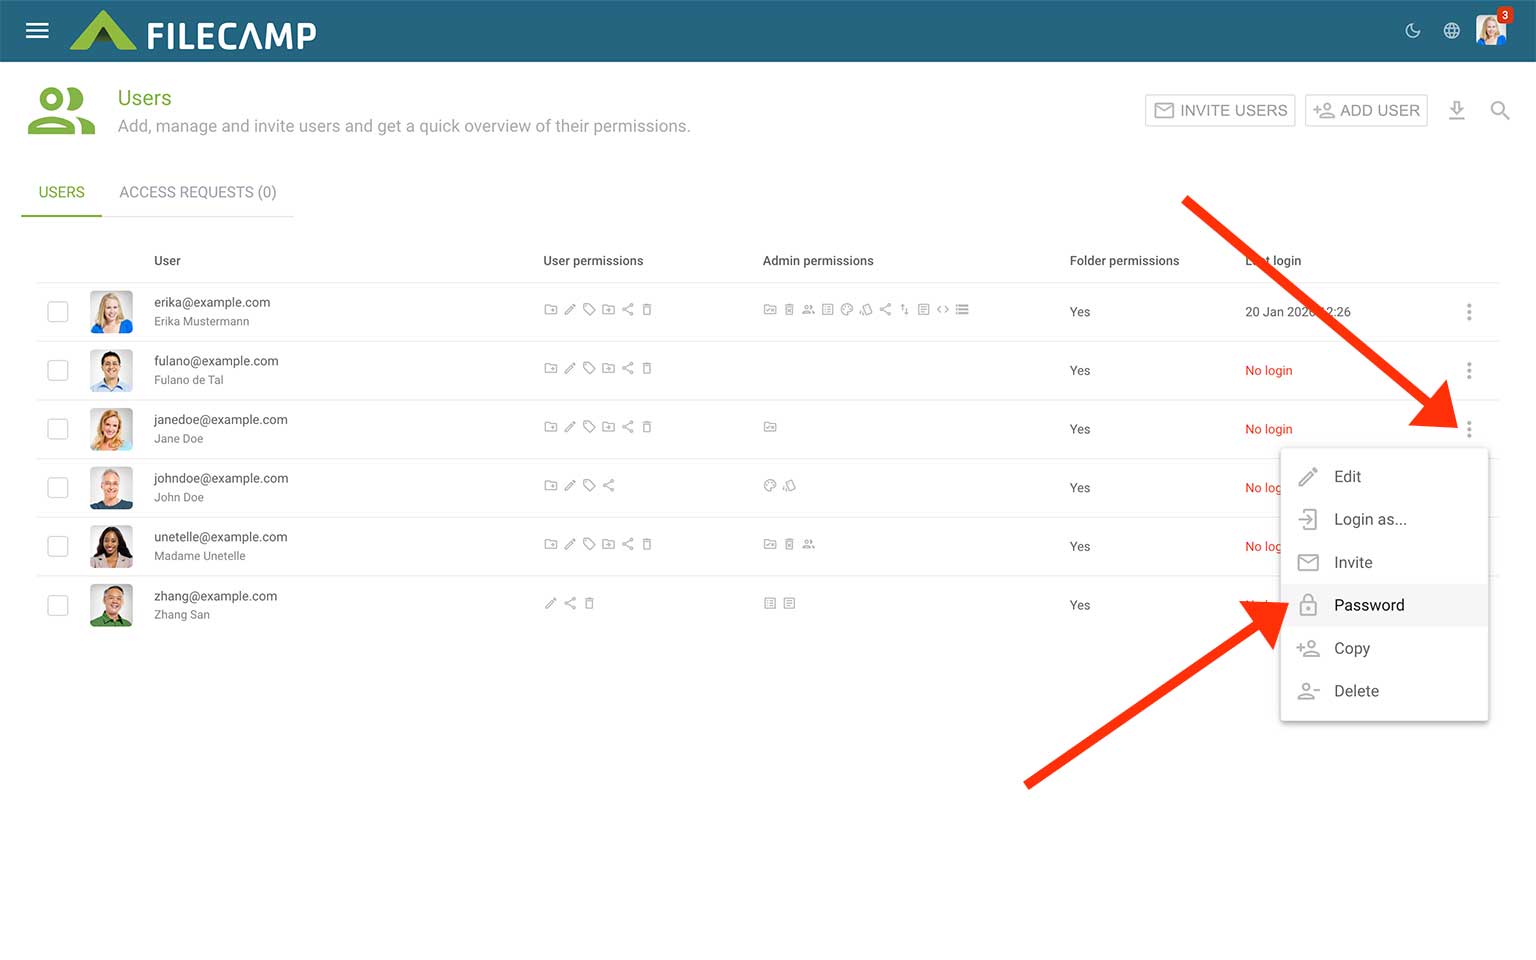
Type a new password if you want to change the password. You will need to type the new password twice to confirm. Then click SAVE.
Copy User
When adding a user it's sometimes easier to simply copy all user, admin, and folder permissions from an existing user.
Go to Admin > Users from the main menu ![]() . Click the Three Vertical Dots
. Click the Three Vertical Dots ![]() icon. Choose Copy
icon. Choose Copy ![]() .
.
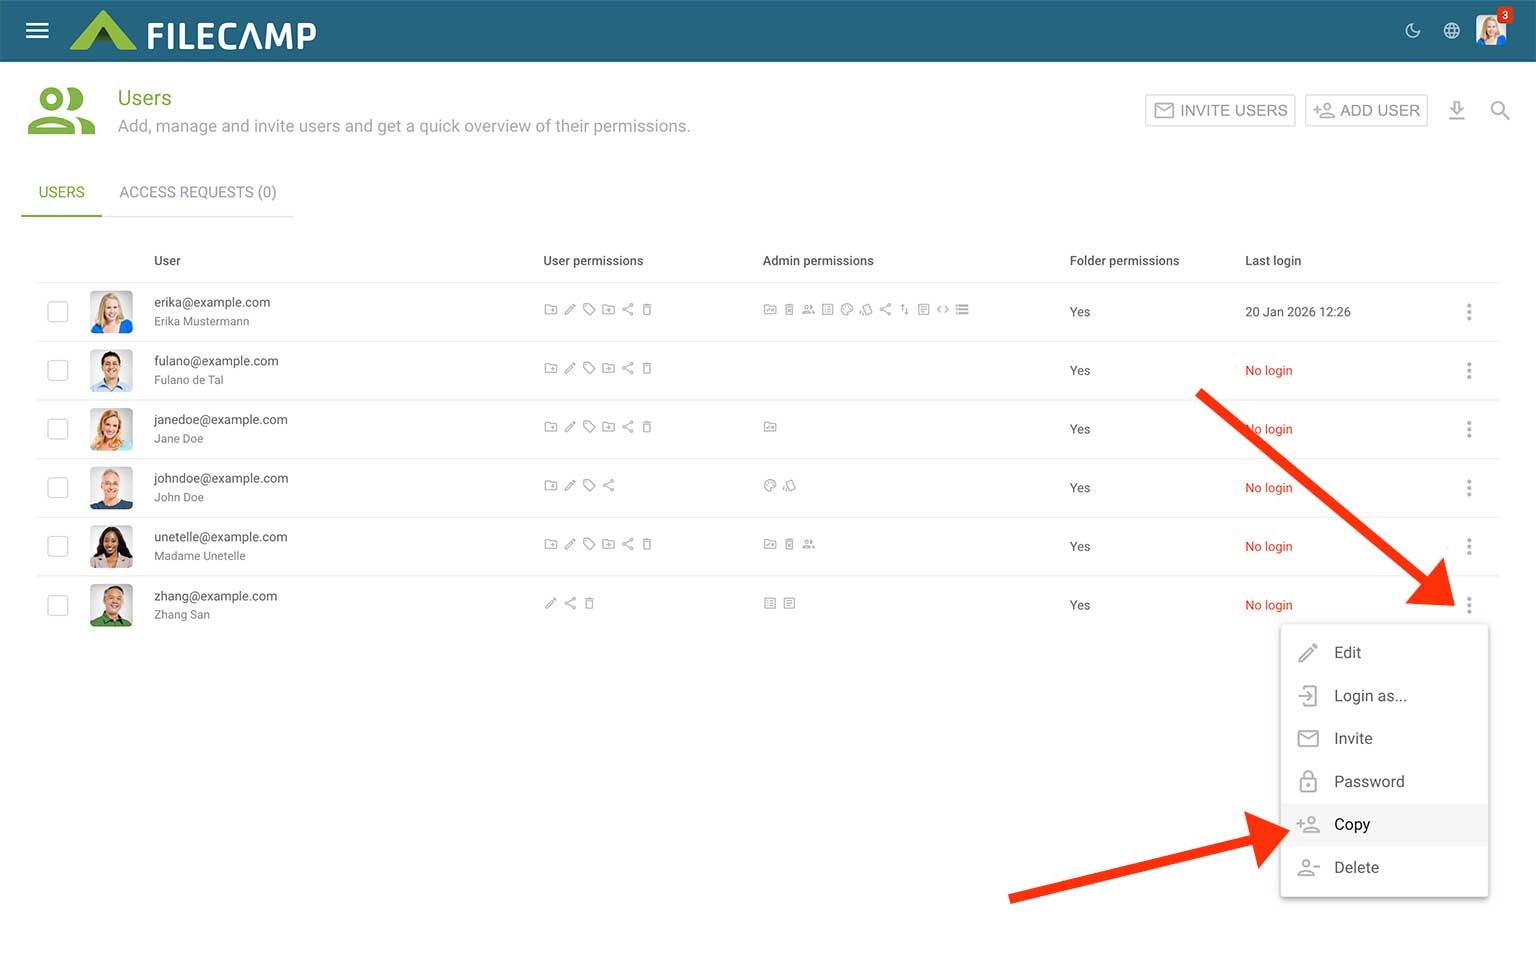
You can now send the new User an invite with the users login credentials.
Delete User
Navigate to Admin > Users from the main menu ![]() .
.
Then click the Three Vertical Dots ![]() icon on the users list. Choose Delete
icon on the users list. Choose Delete ![]() .
.
The user has now been deleted and will no longer have access.
Log in as another user
To log in as another user, do the following:
- Go to Admin > Users.
- Navigate to or search for the user you want to impersonate.
- Click the Three Vertical Dots
 icon in the user list. Choose Log in as
  . This will log you in as that user in the same browser tab.
 - A persistent “logged in as another user” notice is shown while you are viewing the account as another user.
- When you have finished checking the account from the user’s perspective, log out. You will then be directed back to the login screen, where you can log back in as yourself.
Bulk add & invite users
Who wants to be alone? Working with others is much more fun (at least sometimes 😉 ). Invite as many users as you want, there are no limitations.
Navigate to Admin > Users.
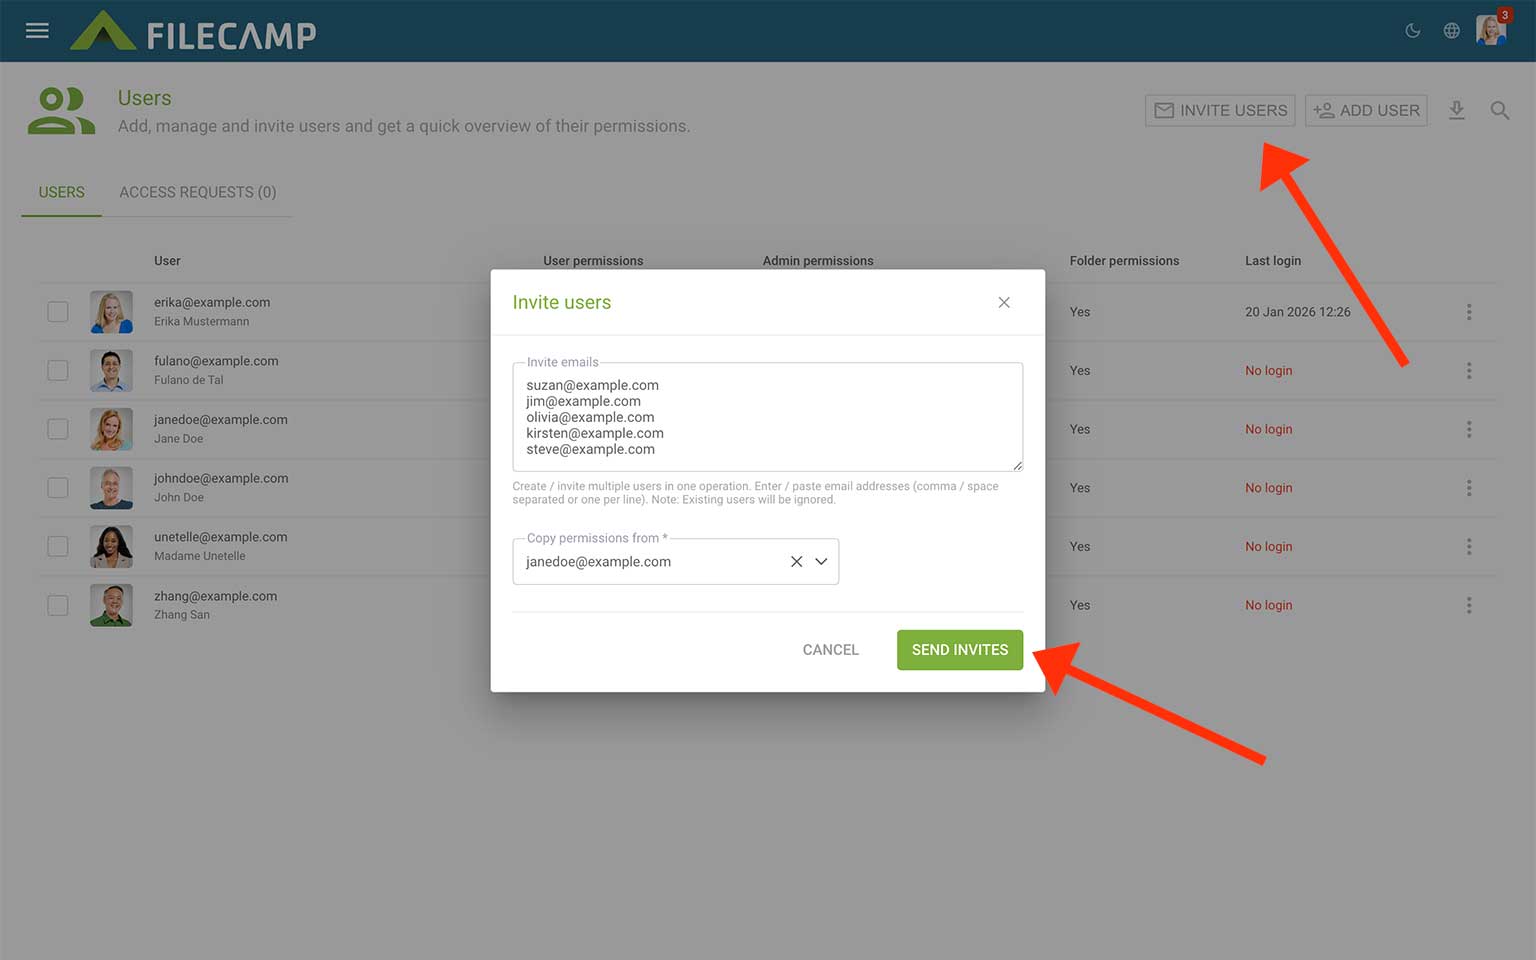
Then click the ![]() Invite users button in the Toolbar. You can now create and invite multiple users in one operation. Just enter or paste a list of email addresses (comma/space separated or one per line).
Invite users button in the Toolbar. You can now create and invite multiple users in one operation. Just enter or paste a list of email addresses (comma/space separated or one per line).
Select which user to copy access and permissions from. And click Send invites.
The users will then be added, and login credentials have been sent to each user via email.
These new users will now have the exact same User, Admin, and Folder Access as the user from whom you copied permissions.
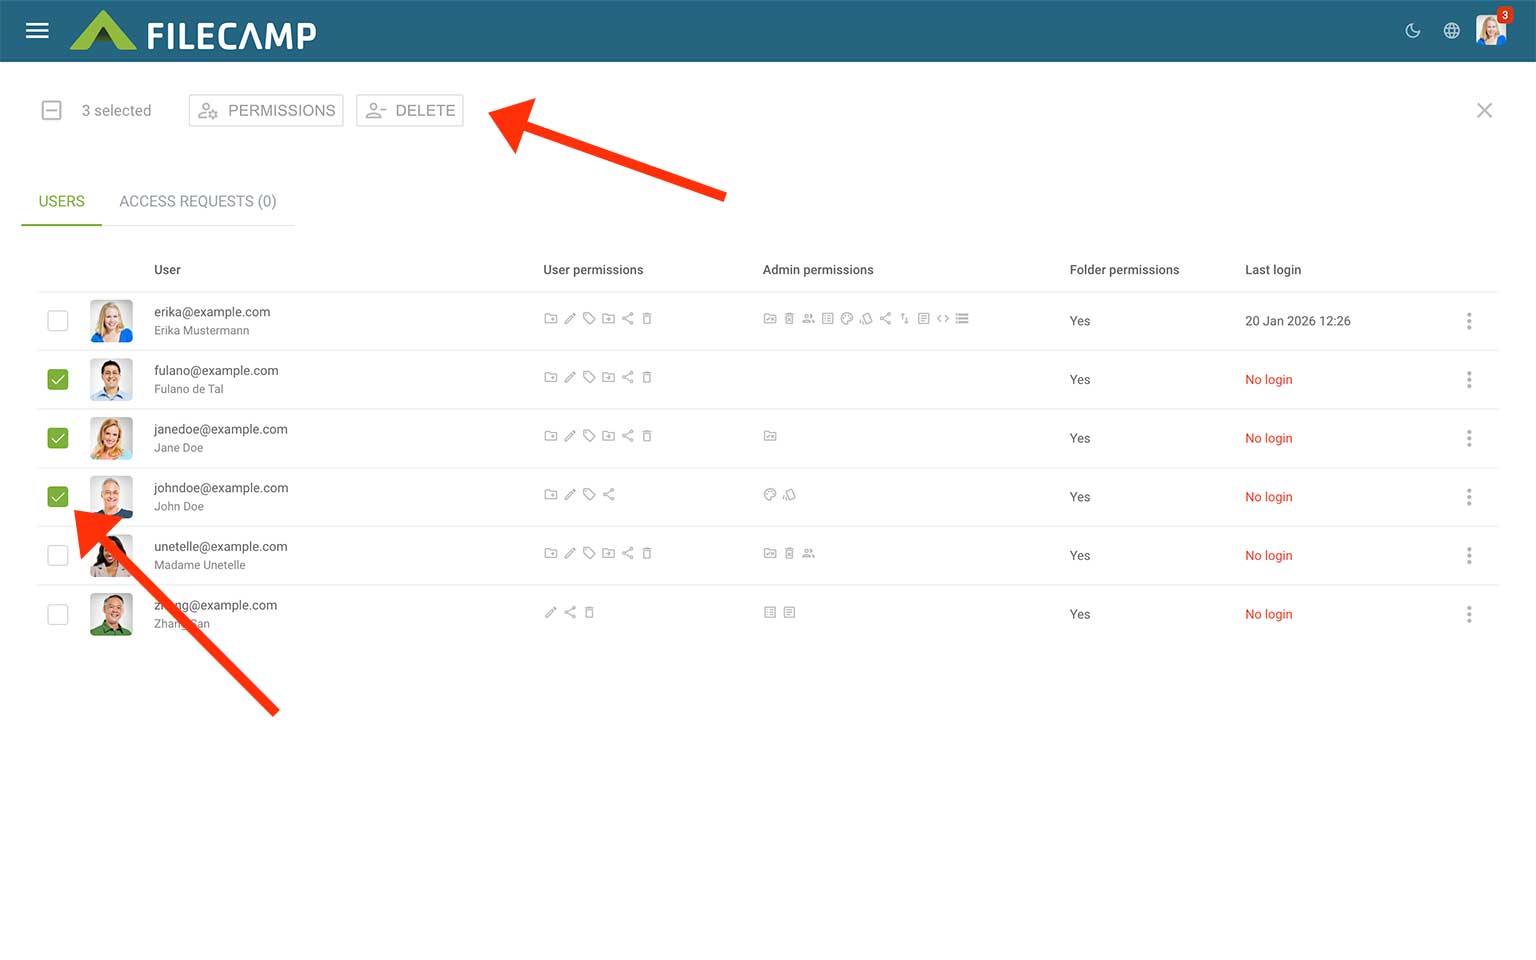
Delete multiple users
Navigate to Admin > Users.
Select the users you want to delete and press the![]() DELETE button in the Bulk Action Bar.
DELETE button in the Bulk Action Bar.
All the selected users will then be deleted and will no longer have access.
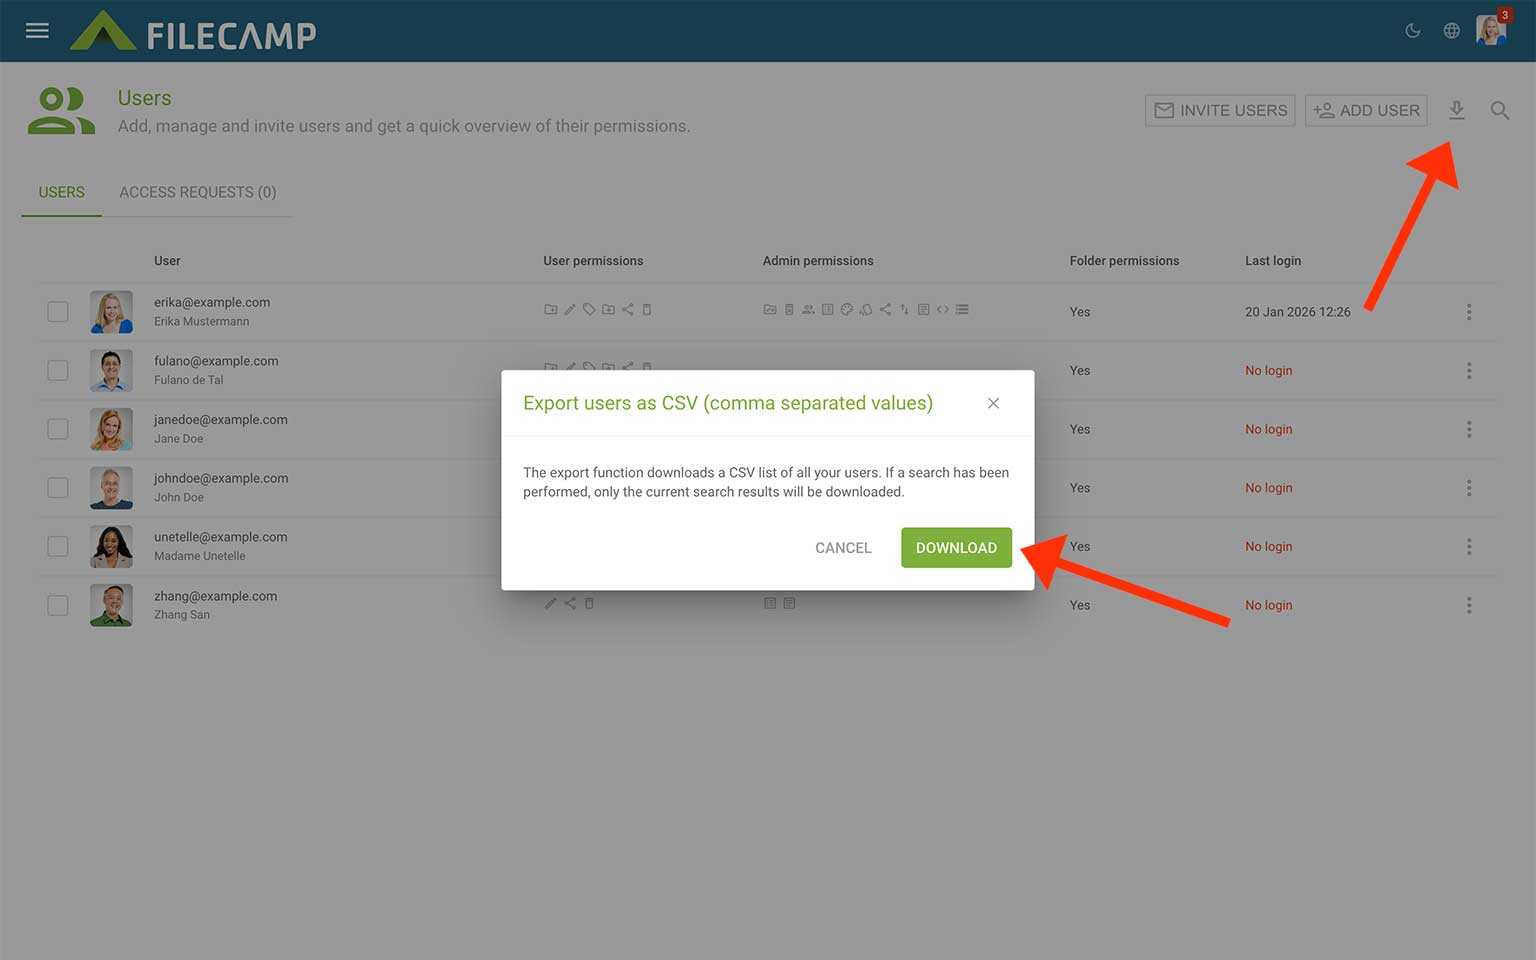
Download users as a .CSV file
In case you want to send emails to some of your users outside Filecamp, you can download your user list as a .CSV file. Simply click on Download ![]() icon to download a list of all your users as a .CSV file.
icon to download a list of all your users as a .CSV file.
Comma-separated value (CSV) files are files that contain data from a table listed in plain text form, such as email contact details. Although CSV files can be opened with many programs, like text editors, the data they contain is best viewed using a spreadsheet program, such as Microsoft Excel or Google Sheets.
Bulk permissions update
A real time saver if you need to update multiple users in one go.
- Navigate to Admin > Users.
- Select the users you want to update.
- Click the
 Permissions button in the Bulk Action Bar. A Bulk permission update window will appear where you can select which user you want to copy permissions from.
 - Choose whether to update user/admin permissions or folder permissions only.
- Click UPDATE PERMISSIONS. The selected users will be updated so that they have the exact same User, Admin, and Folder permissions as the user you have copied them from.
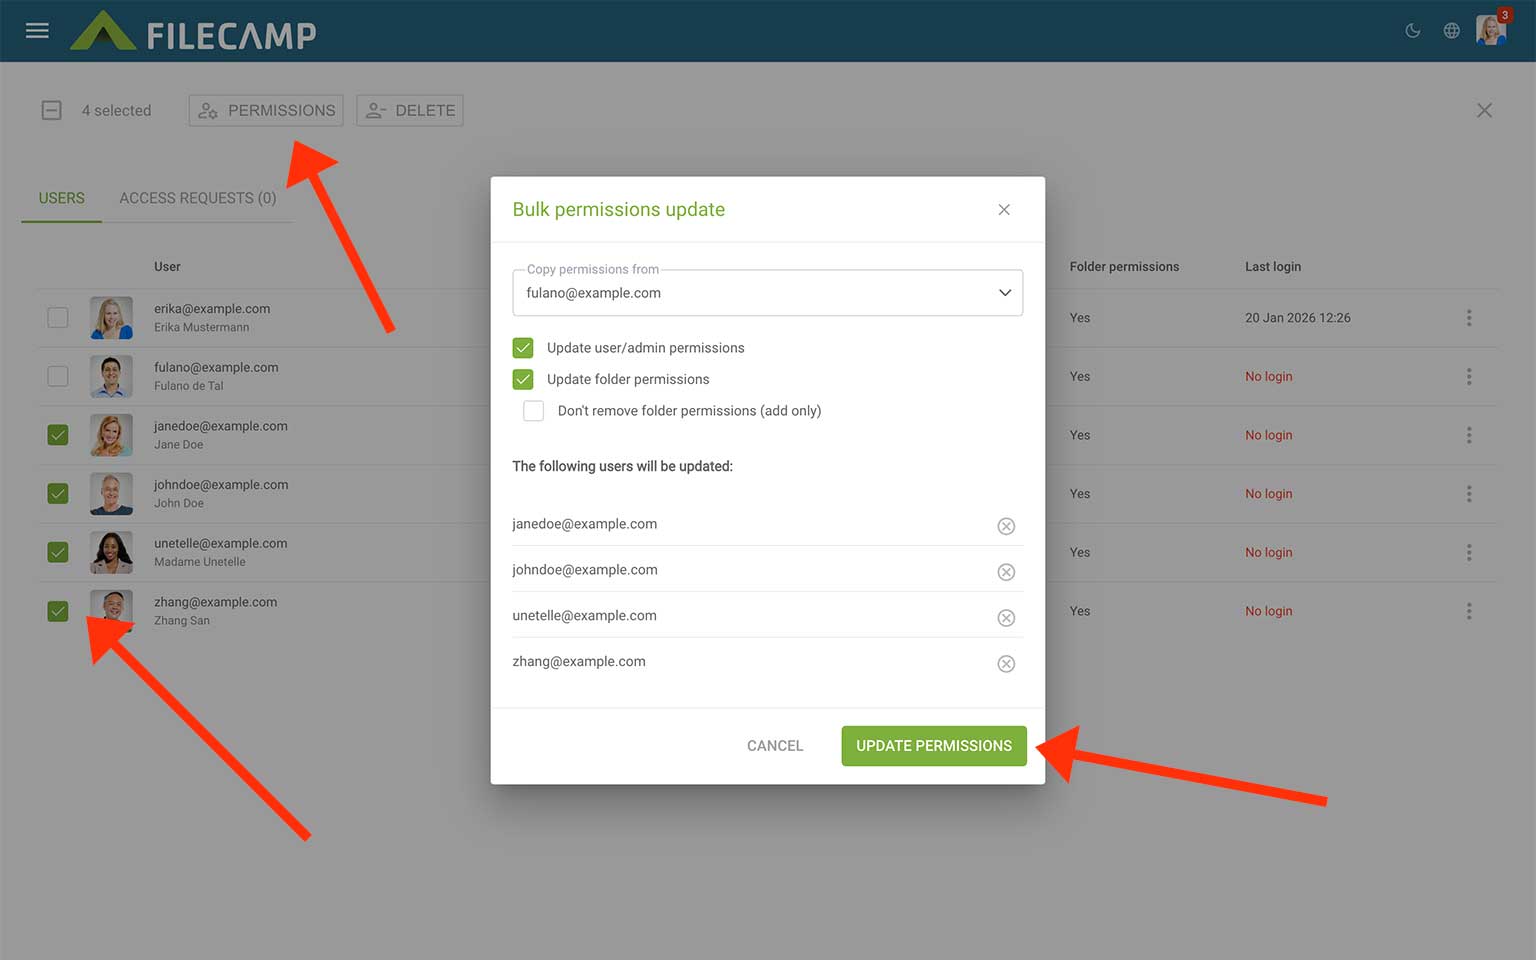
TIP: When checking the Update folder permissions checkbox, you can choose Don't remove folder permissions (add only).
This is a very useful feature if you need to give multiple users permission to an additional folder, without changing the folder permissions they already have. Eg. you could create a user with permission to a folder, and use this user as a "template" to add the folder permission to other users.
This article reviews the following topics:
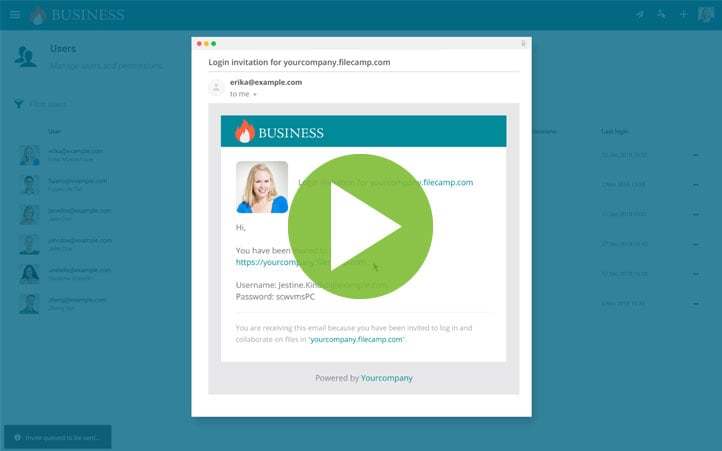
VIDEO
Add & invite users
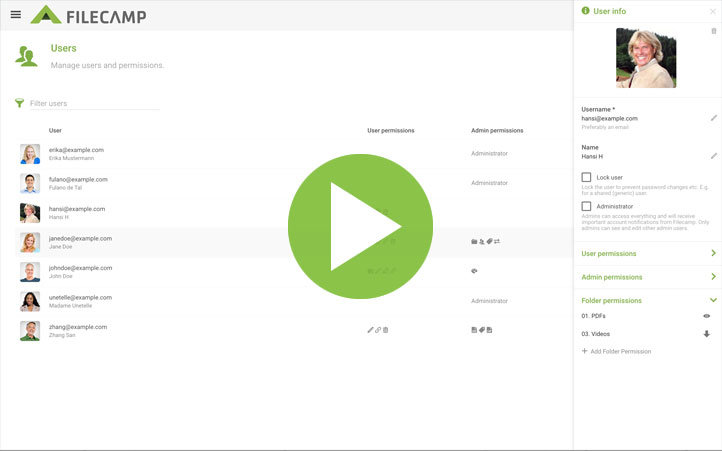
See how to add a user, give the user access to a folder, and send the user an invite.